All posts in How-to Guides

How to Enable Safe Mode In Windows Operating System

The safe mode of Windows Operating System serves as a diagnostic mode that could help repair the problems from the outside of the system. It is also used as a mode of operation by application software. The safe mode currently is widely used to remove fake security protection utilities. The safe mode options include Safe Mode with Networking, Safe Mode with Command Prompt, Debugging Mode, Disable automatic restart on system failure and so on.

How to Active Safe Mode In Windows Operating System?

For Windows 7 Users

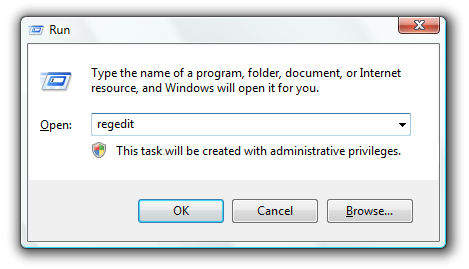
  • On the desktop, press ”Windows+R” button to run the command line.
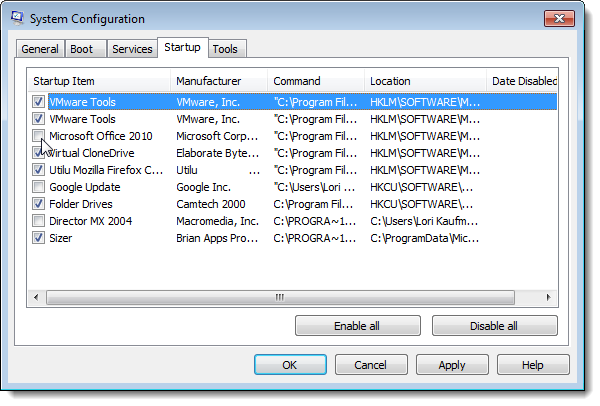
  • Type msconfig onto the command line, press Enter button to activate the System Configuration tool.

win7-safemode-01

  • Click Boot tab.
  • Under Boot options, click Safe boot and then select Minimal option.

win7-safemode-02

  • Click Apply, and then click OK.
  • Click the Restart button on the pop-up to reboot the computer.

win7-safemode-03

  • The PC will start in Safe Mode.

For Windows 8 Users

  • Click Settings on the right side of the desktop.

win8-safemode-01

  • Navigate to Change PC settings.

win8-safemode-02

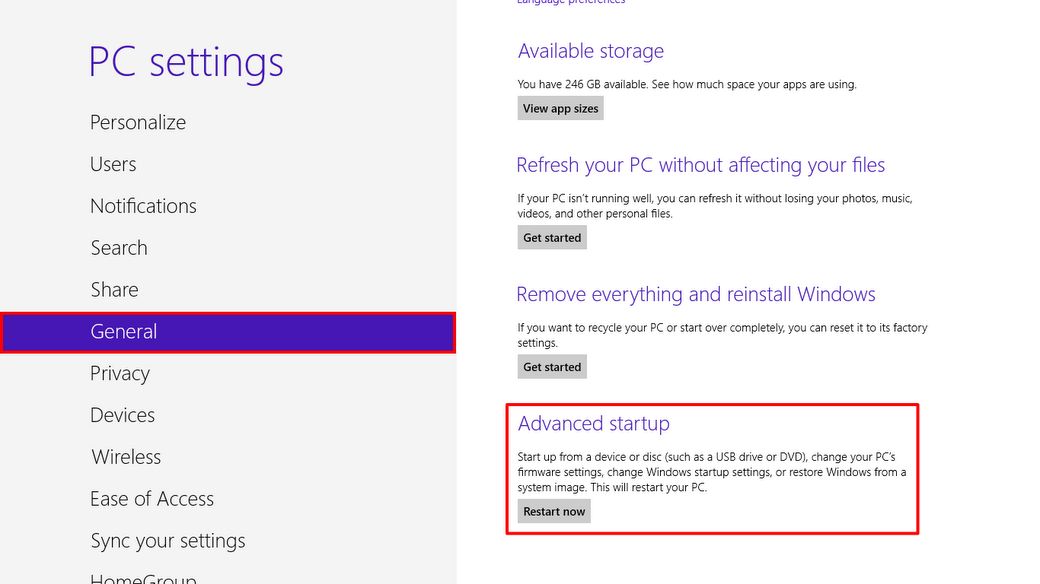
  • Under General section, click on Advanced startup.

win8-safemode-03

  • Navigate to Update and recovery.

win8-safemode-04

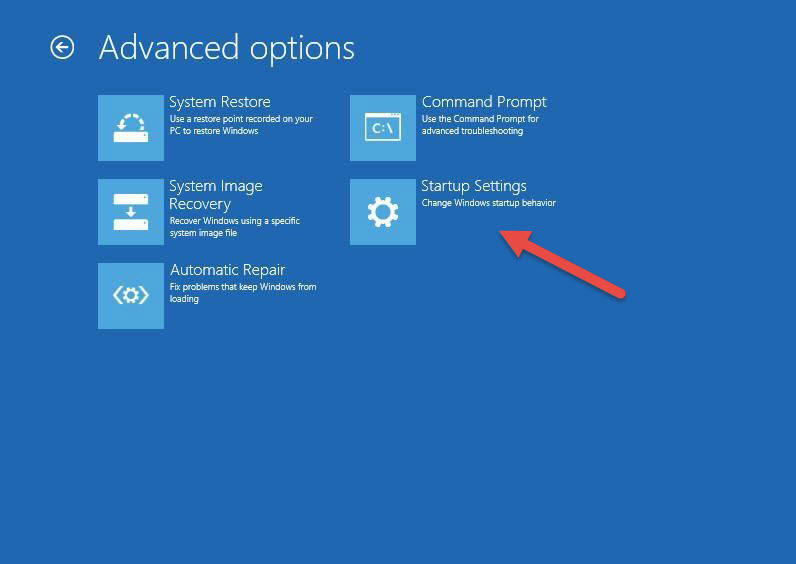
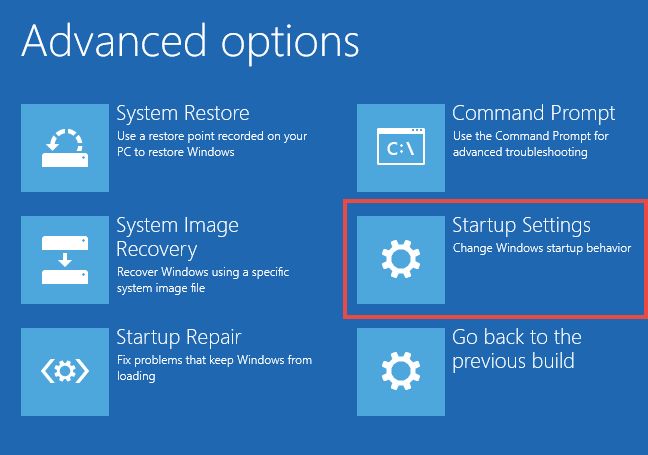
  • Click On Troubleshoot. Click on Advanced options.

sn5-win8-safemode-05

sn6-win8-safemode-06

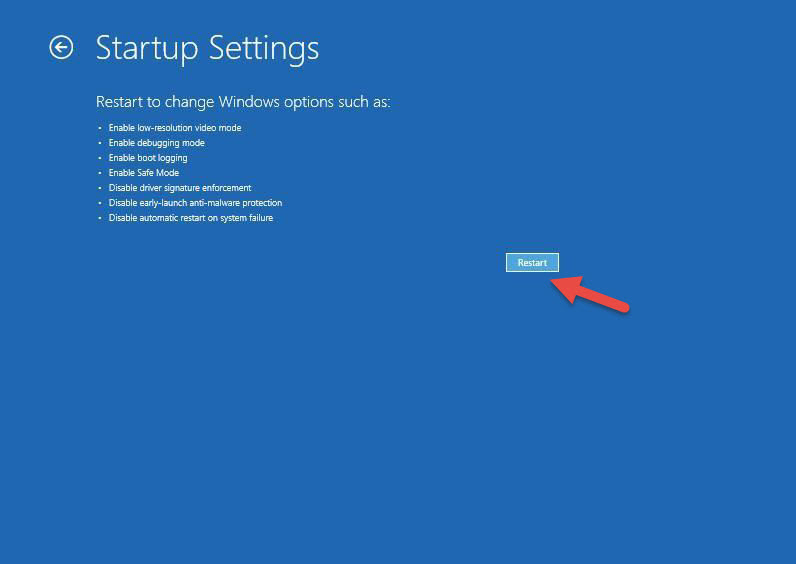
  • Click on Startup settings. Click Restart button to reboot the system.

sn7-win8-safemode-07

sn8-win8-safemode-08

For Windows 10 Users

  • Click Start, and then go to the Power option.

win10-safemode-01

  • Select the Restart option to reboot the Windows 10 system.

win10-safemode-02

  • Once the system restarts, select the Troubleshoot option.
  • Click Advanced options.

win10-safemode-04

  • And then navigate to Startup Settings. Select the safe mode option you need.

win10-safemode-05

Simple Steps to Turn on Windows Firewall

Windows Firewall is provided by Microsoft for its Windows users to filter potentially unneeded files through the data accessing the system. It is a host-based firewall that is included in almost all versions of Windows Operating System and contains a series of advanced and easy-to-manage utilities. The major purpose of malware is to make destructive modification over the security related services and penetrate into the system secretly with commercial purposes. To safeguard your system from unpredictable cyber attacks, it is suggested to keep Windows Firewall running at the background of the system. You can follow the detailed instructions to enable Windows Firewall manually.


For Windows 7

  • Click Start, and then go to Control Panel.
  • Click System and Security, and then navigate to Windows Firewall.
  • Select the Turn Windows Firewall on or off option. You might be required to type the admin password to confirm your modification.

win701-turn-on-firewall

  • Under the appropriate network setting, select Turn on Windows Firewall.

win702-turn-on-firewall


For Windows 8

  • Press Windows+X, and then navigate to Control Panel.
  • Go to Security. Navigate to Windows Firewall. Click Turn Windows Firewall on or off. If you are prompted to enter the administrator password, type the password onto the dialog box. Press Enter button.
  • Click On (recommended), and then click OK.

win8-turn-on-firewall


For Windows 10

  • Click Start, from the Search box, type services.msc onto the dialog box, press Enter button to open up Services.

windows-10-run-services-msc

  • Scroll through the services list and highlight Windows Firewall.
  • Right-click Windows Firewall and select Restart option.
  • Take some time to wait until the process is completed.
  • Right-click on Windows Firewall and then click Properties.
  • From General, under the Startup type: is set to Automatic.

How to Clean Up Cache In Major Browsers?

The web cache file is also considered as HTTP cache. It is generated with the help of an information technology that especially designed for temporary storage of web documents, including HTML pages as well as image files. It is mainly used to reduce the consumption of network bandwidth, server load and perceived lag. It is suggested to clear the cache files periodically for the information stored as cache files are closely related with user’s private information or personal data that get access to browser services.

According to the reports released by world-leading security clients, there is an upswing of cyber hackers take advantage of cache files to extract out user’s sensitive or commercial information for the preparation of cyber blackmail and identity theft. They also have the capability to penetrate into the deep parts of the system through browser vulnerabilities and then manipulate PC activities in an aggressive manner. To efficiently safeguard your system as well as your private files from unpredictable intrusion, it is suggested to take actions to remove cache files periodically.

You can follow the Instructions listed below to remove cache files from Mozilla, Microsoft Edge, Google Chrome as well as Opera.

For Mozilla Firefox Users

Manually clear the cache

  • Click the menu button firefoxcache-01and navigate to Options.
  • Select the Advanced panel.
  • Click on the Network tab.
  • In the Cached Web Content section, click Clear Now to remove the cache files.

firefoxcache-02
Auto options for cache removal

  • Click the menu button and go to Options.
  • Click to run Privacy panel.
  • Under History, set Firefox will: to Use custom settings for history.
  • Select the check box for Clear history when Firefox closes.

autofirefoxcache-02

  • Beside Clear history when Firefox closes, click Settings…. The Settings for Clearing History dialog box opens up.
  • Under Settings for Clearing History section, select Cache.

autofirefoxcache-03

  • Click OK to close the Settings for Clearing History dialog box.
  • Close the about:preferences page. Any changes you’ve made will automatically be saved.


For Microsoft Edge Users

  • In the top right, click Hub.
  • Navigate to History section, and then click Clear all history.
  • Select Browsing history, then Cookies and saved website data, and then Cached data and files. Click Clear.
  • Once “All Clear!” message pops up, exit the browser and reopen it.

 mecache-01

For Google Chrome Users

  • In the browser bar, enter:

chrome://settings/clearBrowserData

  • Select the options listed below:

Browsing history
Download history
Cookies and other site and plug-in data
Cached images and files

  • Under Obliterate the following items from: drop-down menu, you can choose the period of time for which you want to clear cached information. To clear your    entire cache, select the beginning of time.
  • Click Clear browsing data.
  • Exit the browser and reopen it.

 chrome-clear-web-cache

For Opera Users

  • From the Opera menu, navigate to Settings, and then click Delete Private Data….
  • From the latest popped-up dialogbox, select the items you wish to clean up, click Delete to start the removal process.
  • Exit the browser and re-open it.

sn-opera-delete-cache

How Do I Know If My Computer Has Been Infected by Malicious Software

The upswing of cybercrime during the past recent years is reported to have taken control of tens of millions of vulnerable computer systems. The cyber hackers take advantage of malicious software to penetrate into victims’ systems on purpose of getting hold of the personal or commercial information stored on the system, which is believed to be able to convert into money. The intrusion process of malicious software also has the ability to pose threat on system performance. To safeguard the system functions as well as financial information from unpredictable violation, you may consider taking some time to read the article below in order to know more about malicious software.

The malicious software usually comes with hidden toolkits inserted by cyber hackers in order to breach system security functions and get entered the system without interception. It takes actions to make inaccurate modification over the system as soon as it manages to get into the deep side of the system. It turns off system security functions silently, corrupts system files seriously, overwrites the settings and configuration information of third-party programs and get hold of browser functions to track down user’s online transaction. A computer that is under the control of malicious software may have the problems listed below:

Unexpected Changes of Passwords

Local Computer Passwords

The log-in passwords of Windows Operating System are overwritten without your permission. And that hint for the passwords are incorrect. The only thing you can do is to call a professional computer technician.

windows-10-login-screen

Online Passwords

The passwords that are related with your online transaction information and social media website accounts have been totally changed to other option silently. You are not allowed to get into your sign-up email accounts because of the same problem.

Undesirable Programs Install Problems

Unneeded third-party programs, ad-supported online games as well as phony antivirus programs are found to flood into your computer and covertly exhaust CPU resources for working stably.

uninstall-app-in-windows-10

Security Function Problems

The built-in Windows security services are discovered to be deactivated without user’s consent. The settings and options of system security function cannot be overwritten. Essential parts of previously installed third-party antivirus application runs into irreparable corruption.

Network Function Issues

Network local settings are inaccurately modified by unknown programs. Network speed remains unstable because of the huge loss of network resources applied by malicious program to transit the information collected on the PC to its remote targeted webserver. WiFi passwords are changed to other options without obtaining user’s consent.

Browser Problems

The browser performance drastically degrades once user opens up multiple web pages. Potentially unneeded browser extensions are found to automatically install at the background of browser function. The security related information specifically used to protect online transaction cannot be displayed correctly for cyber hackers need to gather user’s commercial files accessing browsers and then send them over to its online webserver. The traces related with user’s privacy seem to be under the control of third-party browser toolbars.

browser-issues


How to Manually Make Changes Over the Windows Registry

The Windows registry is an essential part of Windows Operating System. It is specifically designed to help the system store the entire data of low-level system utilities as well as third-party programs, which play important roles in the system operation. It contains a variety of important system information which shouldn’t be inaccurately modified, including the settings of system services, hardware devices, user preferences as well as the configuration information of the operating system.

Any unexpected changes over the Windows registry are likely to prevent the system from working properly. The system with an invalid registry easily runs into a variety of unexplained problems, such as unpredictable Blue Screen pops-up, third-party program install issues, incomplete system start-up as well as unstable system performance. The upswing of third-party registry maintenance utility just proves it. It is not suggested to make any modification on the Registry if you don’t have much computer experience. But it is still necessary to figure out how to safely modify the Windows registry.

How to Back Up the Windows Registry?

Before making changes over the registry, it is recommended to firstly backup the registry files. Once any irreversible mistakes are made during the modification process, you can choose to restore the registry files with the help of the copy. You can follow the instructions listed below to make a backup for the current version of registry files:

  • Step One: Press “Windows+R” button to run the command prompt. Type regedit onto it, and then press Enter button to open up Registry Editor.

Windows-R

type-regedit-in-run1

  • Step Two: From File menu, click Export.

export

  • Step Three: Choose a location for the backup files with the latest pop-up. Click Save to save the files on the hard disk.

How to Restore the Windows Registry?

  • Step One: Press “Windows+R” button to run the command prompt. Type regedit onto it, and then press Enter button to open up Registry Editor.
  • Step Two: From File menu, click Export.
  • Step Three: Choose a location for the backup files with the latest pop-up. Click Save to save the files on the hard disk.
  • Step Four: From File menu, click Import option. Locate the backup file on the hard disk. Click Open to load the file.

sna-import


sna2-import-2

  • Step Five: Next you’ll be prompted with a message in a Registry Editor window:

Adding information can unintentionally change or delete values and cause components to stop working correctly. If you do not trust the source of this information in [REG file], do not add it to the registry. Are you sure you want to continue?

Under the circumstance of Windows XP, this message will appear instead:

Are you sure you want to add the information in [REG file] to the registry?

  • Step Six: Click Yes button to import the .REG file to the Windows Registry.
  • Step Seven: If the import is successful, you should receive the messages listed below:

The keys and values contained in [REG file] have been successfully added to the registry.
You’ll see this one if you’re using Windows XP:
Information in [REG file] has been successfully entered into the registry.

  • Step Eight: Click OK to confirm the changes. And restart the PC later.

How to Delete a Registry Key?

  • Step One: Press “Windows+R” button to run the command prompt. Type regedit onto it, and then press Enter button to open up Registry Editor.
  • Step Two: Press “Ctrl+F” button to activate the search utility of Registry Editor.
  • Step Three: From File menu, click Export.
  • Step Four: Choose a location for the backup files with the latest pop-up. Click Save to save the files on the hard disk.
  • Step Five: Type the name of the registry key onto the latest popped-up box, press Enter button.
  • Step Six: Highlight the registry key you have just found. Right click it, and select the Delete option to remove it.

delete-registry-key
Step Seven: Click Yes to confirm the removal.

How to Add a Registry Key Onto the Windows Registry?

  • Step One: Press “Windows+R” button to run the command prompt. Type regedit onto it, and then press Enter button to open up Registry Editor.
  • Step Two: From File menu, click Export.
  • Step Three: Choose a location for the backup files with the latest pop-up. Click Save to save the files on the hard disk.
  • Step Four: From File, click Import. Locate the .REG file on the hard disk.

add-registry key

  • Step Five: Click Yes to import it into the Windows registry.

It is not suggested to manually make modification over the Windows Registry for the process is too complicated for computer novice. Any problems occur during the process may lead to a partial system disruption. To protect the Windows registry from unexpected damage, you may consider trying a trusted and professional third-party registry maintenance utility to help you deal with the registry issues instead.

How to Manage Windows Startup Programs

650x278xsystem-tray-startup-programs.png.pagespeed.gp+jp+jw+pj+js+rj+rp+rw+ri+cp+md.ic.X6xh7KDxMF

Wonder why your Windows take so long to boot when powered on? One of the common reasons for that is too many programs run at system startup. Those start-up applications typically show an icon in the system tray in the lower right corner of screen, while some just run silently in the background. As more and more programs are set to load automatically, your system performance and memory space tend to suffer. How to regain control of your PC start-up programs? Read on to find out.

1. Program UI (for all Windows versions):

You can take multiple ways to disable startup programs. Usually you can explore the program panel to tweak the auto-launch setting. To do this, open the program, find the settings panel that tend to be available under the menu labelled Settings, Preferences, Options, or Tools, and find the option to disable the program from running at startup.

A decent program will stop loading automatically if you set up the Disable option. But some may still start background processes everytime your computer boots. How to act more effectively to remove unnecessary apps and finally speed up your PC?

2. Task Manager (for Windows 10/8 users):

Windows 8/10 makes it quite easy to view and disable start-up programs in Task Manager. To launch it you can right click Start menu and choose Task Manager from the list (the keyboard shortcut is Ctrl+Shift+Esc). When Task Manager opens it displays by default what programs are currently running on your system. Click the Startup tab, and you will see a list of startup programs. You can identify the status of each program, and disable those that load automatically when you turn on your PC. To disable (or enable) a program just select it and click the Disable( or Enable) button.

startup_9

3. System Configuration (for Windows 7/Vista/XP users):

If you are running Windows 7/Vista/XP, you will need to disable start-up programs using System Configuration utility (also called MSConfig). To use it to manage start-up programs, do the followings: head to Start menu > Run, type msconfig in the Open box and press Enter to open System Configuration window. It will display by default the General tab, and you can click Startup tab to show the list of start-up items. Locate the entry you wanna disable, uncheck the box next to it, and click OK. Then you will be prompted to restart the computer to make the change take effect. If you choose not to restart right now, the change will occur the next time you reboot.

600x406x02_turning_off_startup_programs.png.pagespeed.gp+jp+jw+pj+js+rj+rp+rw+ri+cp+md.ic.81msKYrscR

So that’s it. Now you know how to manage start-up programs on Windows. If you have other computer issues, feel free to contact us, or leave your comment here.

How to Quickly Share Files in File Explorer

share_windows10_files-100526527-primary.idge

If you are a new user who just upgrade from Windows 8 to Windows 10, you will find that the Share charm on the right sidebar has disappeared. To share files in Windows 10, there is a Share button in the File Explorer you can make use of. You can share content with no only local accounts but also the external world. Here are the steps you will need to do if you want to share files such as photos, documents, or videos.

Open up the File Explorer, navigate to the file you want to share, and select it by one click. Click the Share tab and then Share button on the upper left corner. As the sharing menu unfold, you will see three integrated options to share your files to the web: Share, Email, and Zip. You can also burn, print, fax files and modify network sharing options from the sharing menu. Depending on the type of file you select, different option will be available. For instance, if you choose a folder instead of a file, the Share button will be grayed out, while the Zip button will be available.

htg53-650x328

Clicking the Share button will open up the Share sidebar, and you can select the app you want to share with from the list. What you see in the sidebar will vary according to what items you select and which apps you have installed. To configure your sharing options, head to Start menu > Settings > System, and click on the Share tab on the left sidebar. Here you can toggle the frequently used apps list on/off, decide the number of apps appearing in that list, and turn sharing on and off altogether for certain apps.

If there are multiple accounts on your local machine and you want to share files from current account to another one, that’s quite easy to do. Just select the file, and click the “Specific people” link in the Share tab. As a new window pops up, you can select the user account in the list to share with. You can also configure the shared file permissions by clicking the arrow next to the name labelled Permission Level. once you click the Share button in this window, the users who register on your local computer will see the file pop up on the desktop when they log in to your machine.

htg31-650x375

How to share files with someone who live on your same WiFi network? You have to set up a homegroup before transferring files between different computers. Otherwise, click the “Create homepage” link in Share tab and follow prompts to finish the setup.

So that’s it. Now you know how to share files in File Explorer on Windows 10. It is a handy feature that makes sharing easier. Stay with us for latest PC tutorials.

How to Migrate Your Evernote data to Microsoft’s OneNote

onenote-migrate-evernote-644x250

Last month the popular note taking service Evernote announced that its free product, Evernote Basic, would be limited to two devices and the prices for Plus & Premium tiers increased by 40%. If you look for a free alternative to Evernote, Microsoft’s OneNote may be the closest option, which works on the web and other popular platform including Android, iOS, Mac OS. But how to migrate your Evernote notebooks to Microsoft’s OneNote? To help users make the switch, Microsoft released an official tool to move your Evernote data into OneNote (available for Windows 7 & later). This post will show you the detailed steps of using the tool. Let’s get started.

To make the move work, you need a PC running Windows 7 & later, the desktop version of Evernote installed on your computer, and the OneNote Importer tool downloaded from Microsoft. Now perform the steps to do the actual migration:

  • Sign in to Evernote with your Evernote account and be sure to sync latest notes.
  • Double click to run the importer program. When the Welcome screen opens, check the “I accept the terms of this agreement” box and click “Get started”.
  • As the importer scans out and display all the Evernote notebooks it finds, you can select one, some or all notebooks for the migration, and then click Next button.

650x518x02_clicking_import_a_file_instead.png.pagespeed.gp+jp+jw+pj+js+rj+rp+rw+ri+cp+md.ic.sF0aw4DPCi

If you are using Evernote on the Web, you need to export your notes to an Evernote export (..enex)file, and import the data form that file instead. To do this, click the “Import a file instead” link in “Select Evernote content” window. Then click Choose File button to navigate to where you save the .enex file, select the file you want to import, and click Open button. After you specify the file, just click Next button.

After importing your Evernote data, you’ll need to sign in to your Microsoft account to import them to OneNote. Now do the next steps in the OneNote Importer window.

  • Select the Microsoft account you have to save your content to OneNote.
  • Enter your Microsoft email address and password, and click “Sign in” button.
  • Click Import button to begin the migration process. Then your Evernote notes will become pages in OneNote notebooks. You can also check the “Use Evernote tags to organize content in OneNote” box before pressing Import button, then the tags you add to your Evernote notebooks will be imported as sections within the notebooks.
  • Once the migration is completed, click “View notes in OneNote” to open OneNote.

650x508x10_importing_evernote_content.png.pagespeed.gp+jp+jw+pj+js+rj+rp+rw+ri+cp+md.ic.8dQvqTYIaK

Notice: the Evernote data you import to OneNote will be kept in the Documents folder in your OneDrive account online instead of your local machine, which makes it easier to access your OneNote data on any device for which OneNote is available. A Microsoft OneNote Security Notice may display to warn you that the location may be unsafe. Just click Yes to continue since your OneDrive account is a trusted source.

Now a welcome note will be added to the first notebook in the list you import and you can see the note there. You can access them on any platform that OneNote supports.

If you have questions about using the OneNote Importer, see here.

Two Tricks to Change Edge’s Download Folder

microsoft_edge_small_1

As the latest Windows’ default web browser, Edge has be greatly improved compared with its predecessor Internet Explorer. Microsoft also provides options to allow users customize Edge browser’s UI & functionality. But when you first download files on Microsoft Edge browser, you may get confused where to find the downloaded files.

Be default, Edge will automatically save all downloaded files in the current user’ profile folder, namely the C:\Users\User_name\Downloads directory, and you can only access to this folder by opening File Explorer. There is no option you can customize in Edge Settings to change the location where downloaded files are saved.

That’s really a issue, right? We can easily change the download location by adjusting settings within Firefox, Chrome, Opera and even Internet Explorer. But how about Edge? To change the download setting in Edge browser, you have to do something different. Here we list two ways to help you customize the download location.

Trick 1: change download folder location using Registry

  • Press Windows + R keys to open Run dialog box, type “regedit” and press Enter key.
  • When Registry Editor opens, use to left sidebar to navigate to the following key:
    HKEY_CURRENT_USER\SOFTWARE\Classes\Local Settings\Software\Microsoft\Windows\Current Version\AppContainer\Storage\microsoft.microsoftedge_8wekyb3d8bbwe\MicrosoftEdge\Main
  • Right click the Main subkey and then choose New > String Value.
  • Name the new value as Default Download Directory, and double click on it.
  • Type the full path of your desired folder in the Value data box, and click OK.

eddf_3-1-650x390

After that, close Registry Editor and then relaunch Edge browser. Now the file you download within Edge will be saved in the folder you enter in the Value data box. You can also click the Open folder link in Download Manager to open the download folder. Anytime you want to restore default Downloads folder location, just delete the String Default Download Directory from Registry Editor. Apart from that, you can navigate to HKEY_CURRENT_USER\Software\Microsoft\Windows\CurrentVersion\Explorer\User Shell Folders and then set the value of the String %USERPROFILE%\Downloads.

Trick 2: change download folder location using Properties

  • Launch File Explorer by clicking on Start menu > File Explorer.
  • Right click Downloads folder on the left sidebar and choose Properties.
  • Click the Location tab in Downloads Properties window, and click Move button.
  • Select the desire folder in the Browse window, and then click Select Folder button.
  • Click Apply button, and Windows will ask if you want to move the existing files from lode Downloads folder to the new one. Make your choice by clicking Yes or No.

Move_Downloads_Folder_Location_Windows_10

After that, click OK to close the Properties window, and then relaunch Edge browser. One think you should know: this way will change the system-wide Downloads folder path, so the download location in other apps and programs in Windows may be affected too. If you want to restore default Downloads folder location in future, just click Restore Default button under the Location tab in Properties window.

Is this tutorial works for your case? Welcome to communicate with us, or leave your questio here and we’ll try to help you out.