Windows Firewall is provided by Microsoft for its Windows users to filter potentially unneeded files through the data accessing the system. It is a host-based firewall that is included in almost all versions of Windows Operating System and contains a series of advanced and easy-to-manage utilities. The major purpose of malware is to make destructive modification over the security related services and penetrate into the system secretly with commercial purposes. To safeguard your system from unpredictable cyber attacks, it is suggested to keep Windows Firewall running at the background of the system. You can follow the detailed instructions to enable Windows Firewall manually.
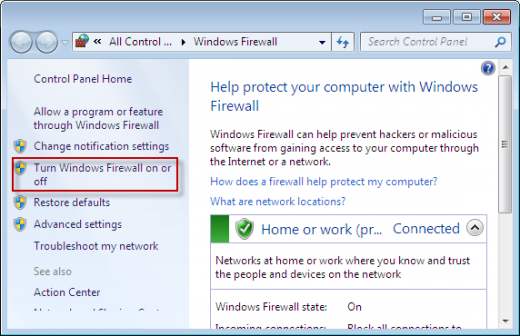
For Windows 7
- Click Start, and then go to Control Panel.
- Click System and Security, and then navigate to Windows Firewall.
- Select the Turn Windows Firewall on or off option. You might be required to type the admin password to confirm your modification.
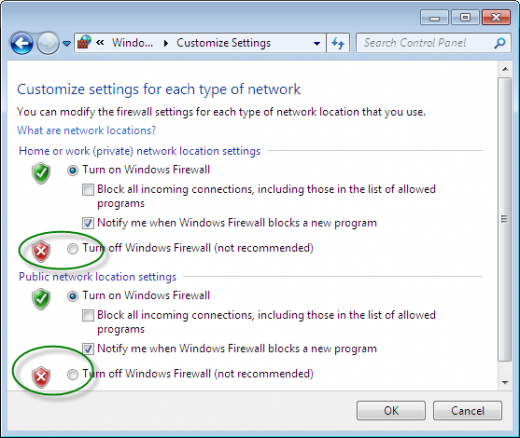
- Under the appropriate network setting, select Turn on Windows Firewall.
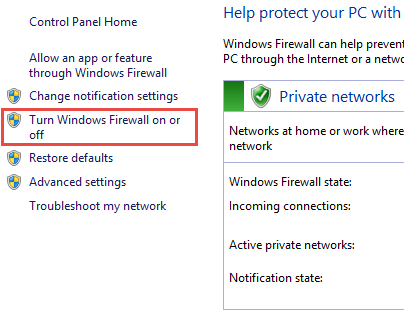
For Windows 8
- Press Windows+X, and then navigate to Control Panel.
- Go to Security. Navigate to Windows Firewall. Click Turn Windows Firewall on or off. If you are prompted to enter the administrator password, type the password onto the dialog box. Press Enter button.
- Click On (recommended), and then click OK.
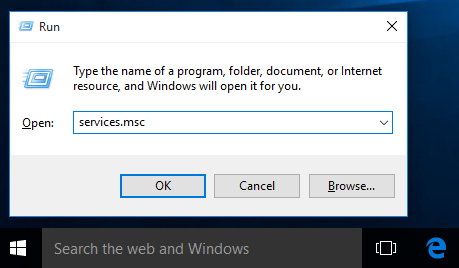
For Windows 10
- Click Start, from the Search box, type services.msc onto the dialog box, press Enter button to open up Services.
- Scroll through the services list and highlight Windows Firewall.
- Right-click Windows Firewall and select Restart option.
- Take some time to wait until the process is completed.
- Right-click on Windows Firewall and then click Properties.
- From General, under the Startup type: is set to Automatic.

