If you are a new user who just upgrade from Windows 8 to Windows 10, you will find that the Share charm on the right sidebar has disappeared. To share files in Windows 10, there is a Share button in the File Explorer you can make use of. You can share content with no only local accounts but also the external world. Here are the steps you will need to do if you want to share files such as photos, documents, or videos.
Open up the File Explorer, navigate to the file you want to share, and select it by one click. Click the Share tab and then Share button on the upper left corner. As the sharing menu unfold, you will see three integrated options to share your files to the web: Share, Email, and Zip. You can also burn, print, fax files and modify network sharing options from the sharing menu. Depending on the type of file you select, different option will be available. For instance, if you choose a folder instead of a file, the Share button will be grayed out, while the Zip button will be available.
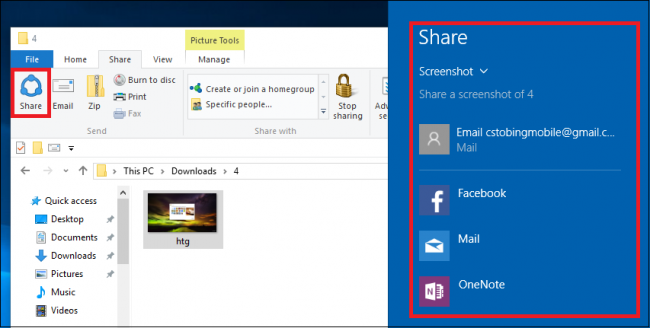
Clicking the Share button will open up the Share sidebar, and you can select the app you want to share with from the list. What you see in the sidebar will vary according to what items you select and which apps you have installed. To configure your sharing options, head to Start menu > Settings > System, and click on the Share tab on the left sidebar. Here you can toggle the frequently used apps list on/off, decide the number of apps appearing in that list, and turn sharing on and off altogether for certain apps.
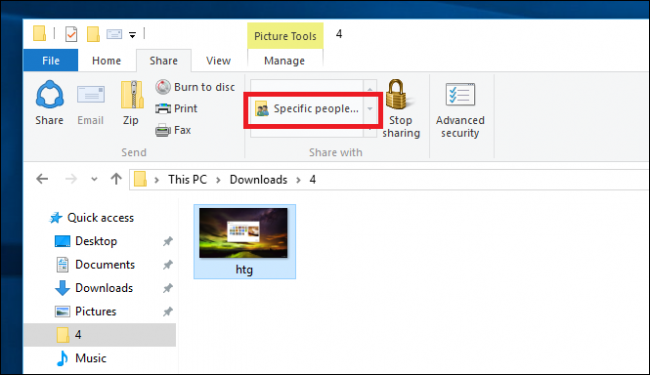
If there are multiple accounts on your local machine and you want to share files from current account to another one, that’s quite easy to do. Just select the file, and click the “Specific people” link in the Share tab. As a new window pops up, you can select the user account in the list to share with. You can also configure the shared file permissions by clicking the arrow next to the name labelled Permission Level. once you click the Share button in this window, the users who register on your local computer will see the file pop up on the desktop when they log in to your machine.
How to share files with someone who live on your same WiFi network? You have to set up a homegroup before transferring files between different computers. Otherwise, click the “Create homepage” link in Share tab and follow prompts to finish the setup.
So that’s it. Now you know how to share files in File Explorer on Windows 10. It is a handy feature that makes sharing easier. Stay with us for latest PC tutorials.

