Archive for July, 2016

No More Ransom: A Website Helps You Fight Against Ransomware

Europol-new-No-More-Ransom-site-tackle-the-exponential-rise-in-ransomware.

“Being attacked by ransomware virus? Need help retrieving your locked data?”

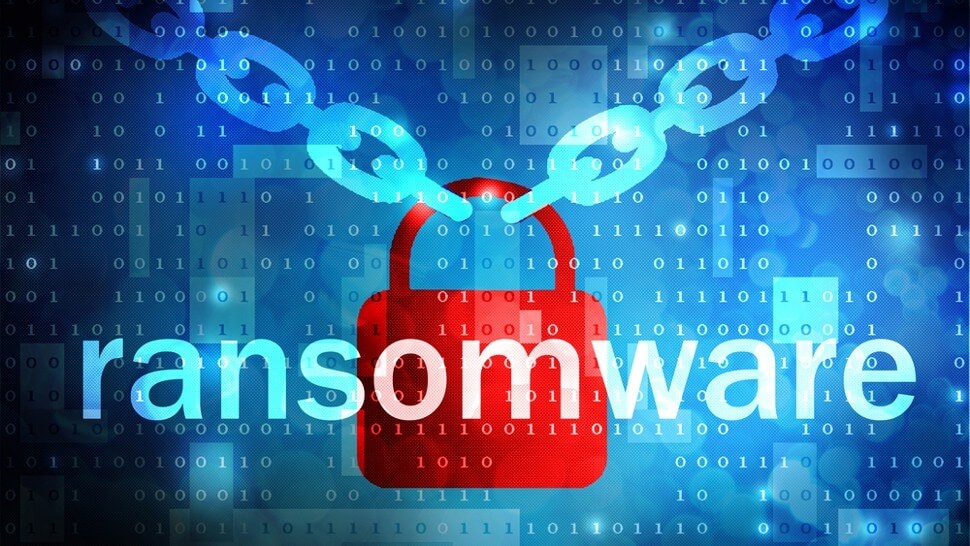
Ransomware is a form of malware used by cybercriminals to lock down users’ mobile or desktop devices (or encrypt their data on the devices) and then demand users’ money for unlocking them. In recent year the number of ransomware attacks are on the rise, according to Kaspersky research. Individual users, companies, organizations and even seats of government have fallen victim to these kinds of attacks.

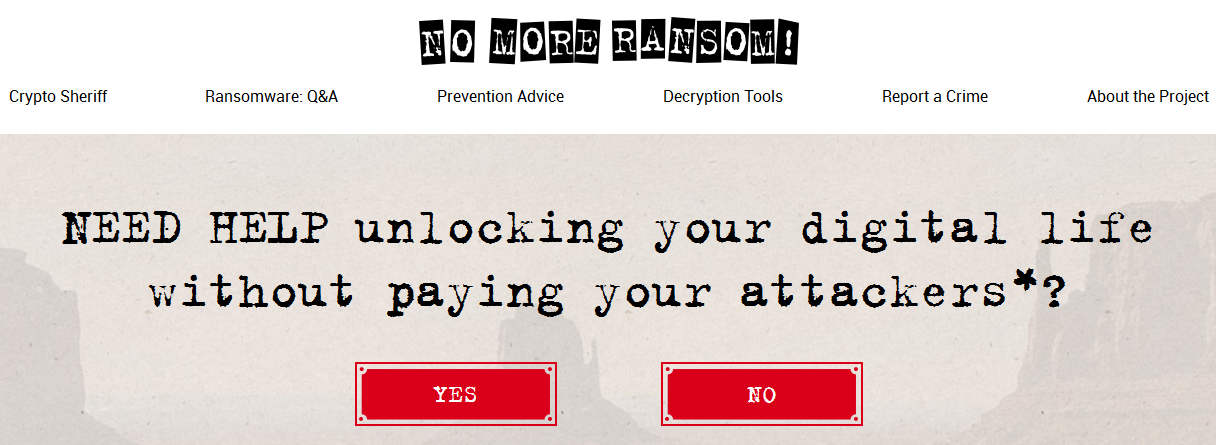
Now law enforcement and IT security companies join forces to fight against ransomware. The Dutch National Police, Europol, Intel Security and Kaspersky Lab have launched an initiative called No More Ransom, to assist users in preventing, identifying, and decrypting ransomware threats. It is an online portal aimed at disrupting cybercriminal businesses with ransomware connections and helping victims to recover their encrypted data without having to pay ransom to the cybercriminals. In this website users can look for security advice, decryption tools and troubleshooting services to deal with ransom attacks. Victims of ransomware can directly report a crime to EU, Dutch, or USA law enforcement from the website.

nomoreransom

Wil van Gemert, Europol Deputy Director Operations, said, “For a few years now ransomware has become a dominant concern for EU law enforcement. It is a problem affecting citizens and business alike, computers and mobile devices, with criminals developing more sophisticated techniques to cause the highest impact on the victim’s data. Initiatives like the No More Ransom project shows that linking expertise and joining forces is the way to go in the successful fight against cybercrime. We expect to help many people to recover control over their files, while raising awareness and educating the population on how to maintain their devices clean from malware.”

The website sums up five types of ransomware: Encryption Ransomware, Lock Screen Ransomware, Master Boot Record Ransomware, Ransomware encrypting web servers, and Mobile device ransomware (Android). That kind of malware is typically delivered through infected email attachments, drive-by-downloads, malvertising, or unknowingly via hacked websites. For more details, see Ransomware: Q & A.

There is a “Crytpo Sherrif” section in the website that lets users upload encrypted files to help define the type of ransomware, and if a solution to your infected device is available, you will be provided with the download link of decryption tool. Users can also head to the “Decryption Tools” section and find out if the tools provided there can work. For instance, the RannohDecryptor tool can be used to recover your data encrypted by the ransomware Rannoh, AutoIt, Fury, Crybola, Cryakl, etc.

2016-07-25-image-6

As for the prevention advice, the website lists the following suggestions, including always backing up your data, using robust antivirus software, keeping your system and software up to date, trusting no one especially no file attachments or links, etc.

Earlier this year, a hospital in Hollywood paid hacker $17,000 in Bitcoin to unlock its data; several weeks ago a Canadian university paid over $15,000 restore access to its computer systems following a ransomware attack. To this issue, No More Ransom encourages victims not to pay the ransom, as their compromise will only confirm that ransomware works, and even so, there is no guarantee the data will be fully restored.

This non-commercial No More Ransom initiative is open to public and private parties, and it calls for more security companies and law enforcement agencies to work together in an effort to fight ransomware and safeguard public network security.

How to Manage Windows Startup Programs

650x278xsystem-tray-startup-programs.png.pagespeed.gp+jp+jw+pj+js+rj+rp+rw+ri+cp+md.ic.X6xh7KDxMF

Wonder why your Windows take so long to boot when powered on? One of the common reasons for that is too many programs run at system startup. Those start-up applications typically show an icon in the system tray in the lower right corner of screen, while some just run silently in the background. As more and more programs are set to load automatically, your system performance and memory space tend to suffer. How to regain control of your PC start-up programs? Read on to find out.

1. Program UI (for all Windows versions):

You can take multiple ways to disable startup programs. Usually you can explore the program panel to tweak the auto-launch setting. To do this, open the program, find the settings panel that tend to be available under the menu labelled Settings, Preferences, Options, or Tools, and find the option to disable the program from running at startup.

A decent program will stop loading automatically if you set up the Disable option. But some may still start background processes everytime your computer boots. How to act more effectively to remove unnecessary apps and finally speed up your PC?

2. Task Manager (for Windows 10/8 users):

Windows 8/10 makes it quite easy to view and disable start-up programs in Task Manager. To launch it you can right click Start menu and choose Task Manager from the list (the keyboard shortcut is Ctrl+Shift+Esc). When Task Manager opens it displays by default what programs are currently running on your system. Click the Startup tab, and you will see a list of startup programs. You can identify the status of each program, and disable those that load automatically when you turn on your PC. To disable (or enable) a program just select it and click the Disable( or Enable) button.

startup_9

3. System Configuration (for Windows 7/Vista/XP users):

If you are running Windows 7/Vista/XP, you will need to disable start-up programs using System Configuration utility (also called MSConfig). To use it to manage start-up programs, do the followings: head to Start menu > Run, type msconfig in the Open box and press Enter to open System Configuration window. It will display by default the General tab, and you can click Startup tab to show the list of start-up items. Locate the entry you wanna disable, uncheck the box next to it, and click OK. Then you will be prompted to restart the computer to make the change take effect. If you choose not to restart right now, the change will occur the next time you reboot.

600x406x02_turning_off_startup_programs.png.pagespeed.gp+jp+jw+pj+js+rj+rp+rw+ri+cp+md.ic.81msKYrscR

So that’s it. Now you know how to manage start-up programs on Windows. If you have other computer issues, feel free to contact us, or leave your comment here.

How to Quickly Share Files in File Explorer

share_windows10_files-100526527-primary.idge

If you are a new user who just upgrade from Windows 8 to Windows 10, you will find that the Share charm on the right sidebar has disappeared. To share files in Windows 10, there is a Share button in the File Explorer you can make use of. You can share content with no only local accounts but also the external world. Here are the steps you will need to do if you want to share files such as photos, documents, or videos.

Open up the File Explorer, navigate to the file you want to share, and select it by one click. Click the Share tab and then Share button on the upper left corner. As the sharing menu unfold, you will see three integrated options to share your files to the web: Share, Email, and Zip. You can also burn, print, fax files and modify network sharing options from the sharing menu. Depending on the type of file you select, different option will be available. For instance, if you choose a folder instead of a file, the Share button will be grayed out, while the Zip button will be available.

htg53-650x328

Clicking the Share button will open up the Share sidebar, and you can select the app you want to share with from the list. What you see in the sidebar will vary according to what items you select and which apps you have installed. To configure your sharing options, head to Start menu > Settings > System, and click on the Share tab on the left sidebar. Here you can toggle the frequently used apps list on/off, decide the number of apps appearing in that list, and turn sharing on and off altogether for certain apps.

If there are multiple accounts on your local machine and you want to share files from current account to another one, that’s quite easy to do. Just select the file, and click the “Specific people” link in the Share tab. As a new window pops up, you can select the user account in the list to share with. You can also configure the shared file permissions by clicking the arrow next to the name labelled Permission Level. once you click the Share button in this window, the users who register on your local computer will see the file pop up on the desktop when they log in to your machine.

htg31-650x375

How to share files with someone who live on your same WiFi network? You have to set up a homegroup before transferring files between different computers. Otherwise, click the “Create homepage” link in Share tab and follow prompts to finish the setup.

So that’s it. Now you know how to share files in File Explorer on Windows 10. It is a handy feature that makes sharing easier. Stay with us for latest PC tutorials.

How to Migrate Your Evernote data to Microsoft’s OneNote

onenote-migrate-evernote-644x250

Last month the popular note taking service Evernote announced that its free product, Evernote Basic, would be limited to two devices and the prices for Plus & Premium tiers increased by 40%. If you look for a free alternative to Evernote, Microsoft’s OneNote may be the closest option, which works on the web and other popular platform including Android, iOS, Mac OS. But how to migrate your Evernote notebooks to Microsoft’s OneNote? To help users make the switch, Microsoft released an official tool to move your Evernote data into OneNote (available for Windows 7 & later). This post will show you the detailed steps of using the tool. Let’s get started.

To make the move work, you need a PC running Windows 7 & later, the desktop version of Evernote installed on your computer, and the OneNote Importer tool downloaded from Microsoft. Now perform the steps to do the actual migration:

  • Sign in to Evernote with your Evernote account and be sure to sync latest notes.
  • Double click to run the importer program. When the Welcome screen opens, check the “I accept the terms of this agreement” box and click “Get started”.
  • As the importer scans out and display all the Evernote notebooks it finds, you can select one, some or all notebooks for the migration, and then click Next button.

650x518x02_clicking_import_a_file_instead.png.pagespeed.gp+jp+jw+pj+js+rj+rp+rw+ri+cp+md.ic.sF0aw4DPCi

If you are using Evernote on the Web, you need to export your notes to an Evernote export (..enex)file, and import the data form that file instead. To do this, click the “Import a file instead” link in “Select Evernote content” window. Then click Choose File button to navigate to where you save the .enex file, select the file you want to import, and click Open button. After you specify the file, just click Next button.

After importing your Evernote data, you’ll need to sign in to your Microsoft account to import them to OneNote. Now do the next steps in the OneNote Importer window.

  • Select the Microsoft account you have to save your content to OneNote.
  • Enter your Microsoft email address and password, and click “Sign in” button.
  • Click Import button to begin the migration process. Then your Evernote notes will become pages in OneNote notebooks. You can also check the “Use Evernote tags to organize content in OneNote” box before pressing Import button, then the tags you add to your Evernote notebooks will be imported as sections within the notebooks.
  • Once the migration is completed, click “View notes in OneNote” to open OneNote.

650x508x10_importing_evernote_content.png.pagespeed.gp+jp+jw+pj+js+rj+rp+rw+ri+cp+md.ic.8dQvqTYIaK

Notice: the Evernote data you import to OneNote will be kept in the Documents folder in your OneDrive account online instead of your local machine, which makes it easier to access your OneNote data on any device for which OneNote is available. A Microsoft OneNote Security Notice may display to warn you that the location may be unsafe. Just click Yes to continue since your OneDrive account is a trusted source.

Now a welcome note will be added to the first notebook in the list you import and you can see the note there. You can access them on any platform that OneNote supports.

If you have questions about using the OneNote Importer, see here.

Two Tricks to Change Edge’s Download Folder

microsoft_edge_small_1

As the latest Windows’ default web browser, Edge has be greatly improved compared with its predecessor Internet Explorer. Microsoft also provides options to allow users customize Edge browser’s UI & functionality. But when you first download files on Microsoft Edge browser, you may get confused where to find the downloaded files.

Be default, Edge will automatically save all downloaded files in the current user’ profile folder, namely the C:\Users\User_name\Downloads directory, and you can only access to this folder by opening File Explorer. There is no option you can customize in Edge Settings to change the location where downloaded files are saved.

That’s really a issue, right? We can easily change the download location by adjusting settings within Firefox, Chrome, Opera and even Internet Explorer. But how about Edge? To change the download setting in Edge browser, you have to do something different. Here we list two ways to help you customize the download location.

Trick 1: change download folder location using Registry

  • Press Windows + R keys to open Run dialog box, type “regedit” and press Enter key.
  • When Registry Editor opens, use to left sidebar to navigate to the following key:
    HKEY_CURRENT_USER\SOFTWARE\Classes\Local Settings\Software\Microsoft\Windows\Current Version\AppContainer\Storage\microsoft.microsoftedge_8wekyb3d8bbwe\MicrosoftEdge\Main
  • Right click the Main subkey and then choose New > String Value.
  • Name the new value as Default Download Directory, and double click on it.
  • Type the full path of your desired folder in the Value data box, and click OK.

eddf_3-1-650x390

After that, close Registry Editor and then relaunch Edge browser. Now the file you download within Edge will be saved in the folder you enter in the Value data box. You can also click the Open folder link in Download Manager to open the download folder. Anytime you want to restore default Downloads folder location, just delete the String Default Download Directory from Registry Editor. Apart from that, you can navigate to HKEY_CURRENT_USER\Software\Microsoft\Windows\CurrentVersion\Explorer\User Shell Folders and then set the value of the String %USERPROFILE%\Downloads.

Trick 2: change download folder location using Properties

  • Launch File Explorer by clicking on Start menu > File Explorer.
  • Right click Downloads folder on the left sidebar and choose Properties.
  • Click the Location tab in Downloads Properties window, and click Move button.
  • Select the desire folder in the Browse window, and then click Select Folder button.
  • Click Apply button, and Windows will ask if you want to move the existing files from lode Downloads folder to the new one. Make your choice by clicking Yes or No.

Move_Downloads_Folder_Location_Windows_10

After that, click OK to close the Properties window, and then relaunch Edge browser. One think you should know: this way will change the system-wide Downloads folder path, so the download location in other apps and programs in Windows may be affected too. If you want to restore default Downloads folder location in future, just click Restore Default button under the Location tab in Properties window.

Is this tutorial works for your case? Welcome to communicate with us, or leave your questio here and we’ll try to help you out.