No matter what language you are using on your Windows computer, you can easily install additional languages as you like to view menus, dialog boxes, and other user interface items.

There are two ways to change original language to your preferred one. The first way is to deploy Multilingual User Interface to transform almost the entire user interface to the language of your choice, but that’s available to users of the Ultimate or the Enterprise edition of Windows. The other one is to install a language interface packs, which is more freely available to users of Windows Home and Home Premium versions as well. Language packs will transform the most commonly used areas of the user interface, rather than the entire one to another language. Today we’re gonna show you how to install and change language packs on Windows. To install additional languages on your Windows, you can either use the Language Control Panel to easily change your system language, or you can download language pack from external links and install it separately. To install additional language packs using Windows Update, here are the steps to follow:
- Click Start menu, choose Settings, and then click Time & Language.
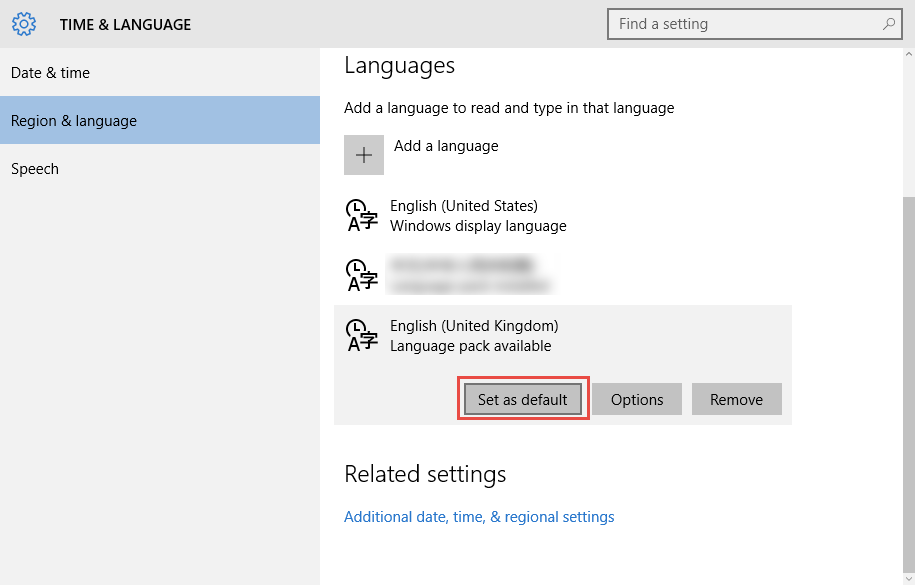
- Click Region & language in the left panel, and click Add a language on the right.
- Select the language you want in the opened panel and it will start downloading.
- Click on the language that has been installed, and then click Set as default.
- Log out and log in again to make the change take effect.
Now, if Windows fails to download or install the language pack for unknown reason, you can download and install it manually. You should download the correct language pack matching your OS first, and then install it by performing the following steps:
- Press Windows + R keys together to bring up the Run dialog.
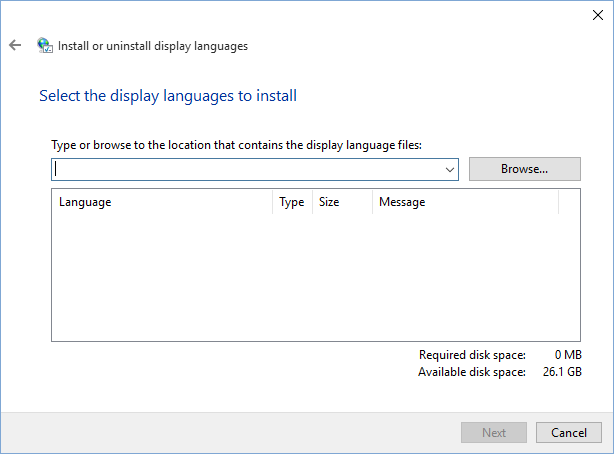
- Type “lpksetup” in the box and then press Enter.
- Click Install display languages in the Install or uninstall display languages wizard.
- Click Browser… Button, navigate to the location where the language pack file is saved, and select the .cab file there. Then click Next button and wait while it is being installed. The
- whole process may take a considerable amount of time to be completed.
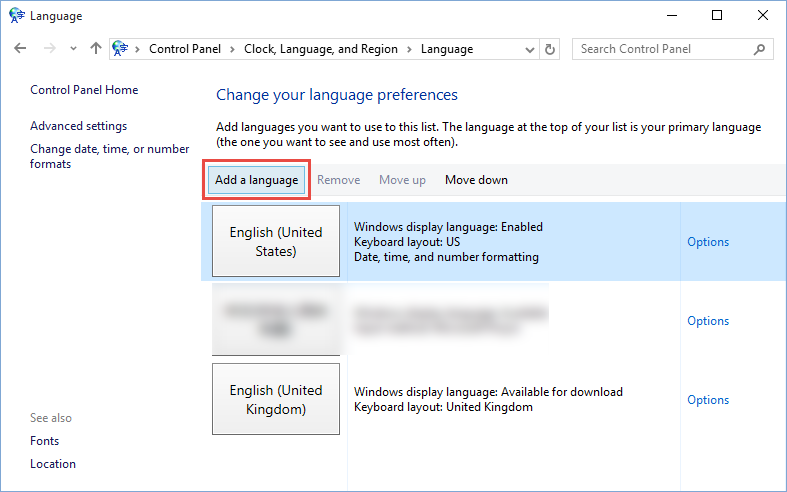
- Head to Control Panel > Clock, Language, and Region > Language.
- Click Add a language and select the language you installed to add it to the list.
- Click Option next to the language and then click Make this the primary language.
- Log out and log in again to make the change take effect.
After that, you can use Windows in your preferred language. The text of dialog boxes, buttons, and windows will be displayed in the language you set as default.
But what if you want to remove or uninstall language packs from Windows 10?
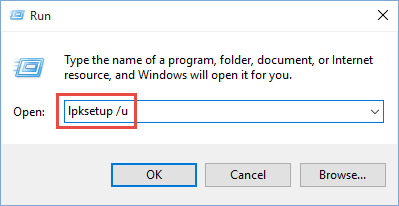
If you wish to remove language packs, you may open a command prompt window, type “lpksetup /u” and hit Enter. The Install or uninstall display languages window will open up. Then you can select the language you wanna uninstall, click Next and the Language Interface Pack will start uninstalling. As soon as the process is finished, you will be asked to restart your computer to complete the language pack uninstall.
Is this article helpful for you? Welcome to share your thoughts here with us.

