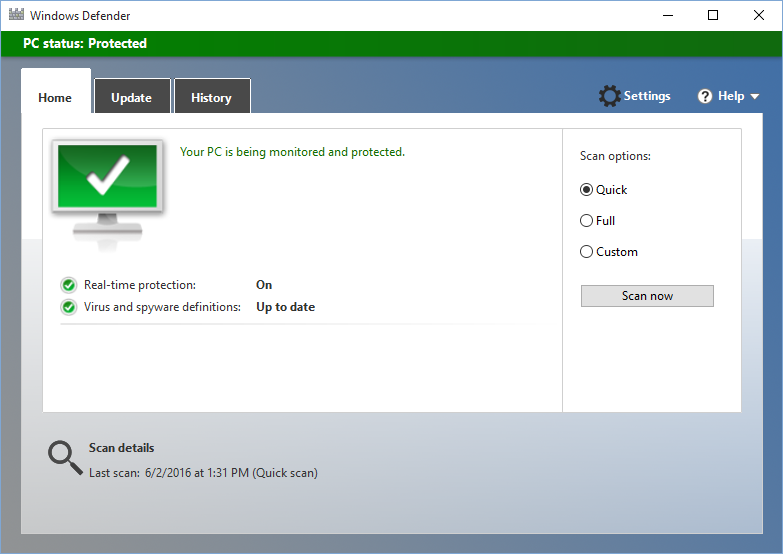
Windows Defender is a Windows built-in app that helps detect and remove malware, spyware or other potentially unwanted software. If you install other 3rd party antivirus or security software, Windows Defender will disable itself automatically, while when the 3rd party software stops functioning, it will activate itself as well. So if you want to make Windows Defender work, you will need to disable your 3rd party security software first. In this guide we will show you how to configure Windows Defender.
There are several ways to open Windows Defender in Windows 10:
- Right click Start menu and choose Control Panel from the list. Type Windows Defender in the upper right corner and click Windows Defender from the result list.
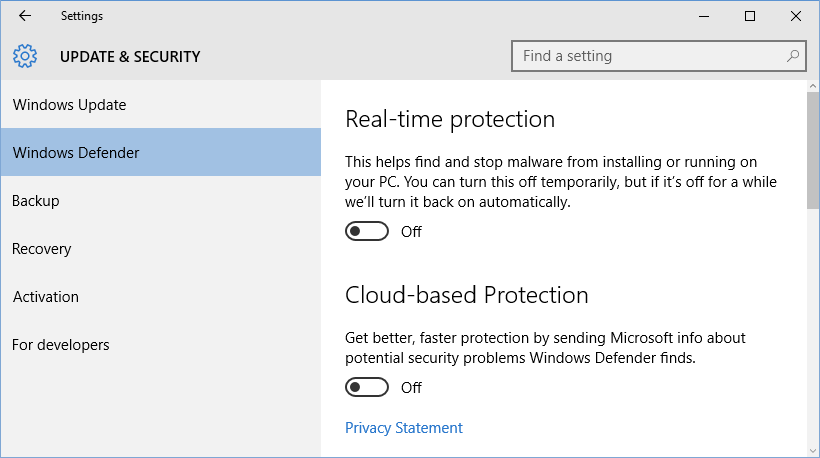
- Press Windows + I keys to open the Setting panel. Click Update & Security, click Windows Defender in the left panel, and scroll down to click Use Windows Defender.
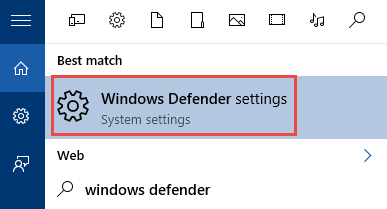
- Click the Search icon in the taskbar, type Windows Defender and click Windows Defender settings from the list. Then scroll down to select Use Windows Defender.
In the Windows Defender UI, you can click Settings button in the upper right corner and then configure Windows Defender, i.e. turning on/off real-time protection, cloud-based protection, or sample submission, as well as adding an exclusion. If you don’t want Windows Defender to scan a specific file, folder or process, click the + icon under Add an exclusion, specify the item, and click Exclude this… button.
If you cannot turn on Windows Defender, check if other security software is running. If not, try to run a complete Windows Update including Windows Defender update.
To disable Windows Defender, Windows 10 users can perform one of these ways:
- Turn off Real-time Protection and Cloud-based Protection in the Settings panel.
- Type services.msc in the Search bar and hit Enter key to open Services Manager. Scroll down to locate Windows Defender Service, and change the startup type from Automatic to Disabled. Also disable Windows Defender Network Inspection Service.
- Click the Search icon, type regedit and hit Enter to open Registry Editor. Navigate to the key HKEY_LOCAL_MACHINE\SOFTWARE\Policies\Microsoft\Windows Defender and set the value of DWORD called DisableAntiSpyware to 1.
- Type gpedit.msc in the Search bar and hit Enter to open Group Policy Editor. Navigate to Local Computer Policy > Computer Configuration > Administrative Templates > Windows Components > Windows Defender, right click on Turn off Windows Defender, choose Edit and then Enable option. Then reboot your computer.
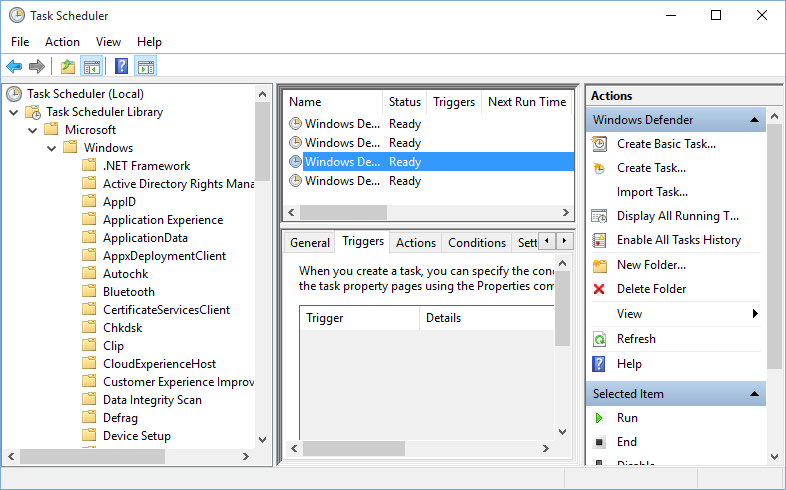
Also, you can schedule a periodic scan in Windows Defender by doing these:
- Type taskschd.msc in the Search bar and hit Enter to open Task Scheduler.
- Navigate to Task Scheduler -> Microsoft -> Windows -> Windows Defender in the left pane, and double click the Windows Defender Scheduled Scan in the middle pane.
- Click the Triggers tab in the open window, and then click New… Button
- Choose begin the task as On a schedule, and then set your time and frequency.
- After that, click Enabled in the left bottom corner and click OK to save the change.
So that’s it. Now you have learned how to configure Windows Defender. If you have any other issues about Windows Defender, leave your question and we’re glad to help.

