Fully Uninstall CHKDSK without Any Problem
Problems in Uninstalling CHKDSK
Try to sweep out CHKDSK from your PC but have no idea how to get rid of it without causing any trouble? Fail to complete the uninstall process for the interruption of popping-up error messages? Wanna clean out all its remnants left behind yet don't know how to detect or locate those files scattering around the system ... ?
Well, you may get lost (or mad) when encountering these uninstall issues, and then your turn to Google for help. CHKDSK get installed on users' computers for intentional or unintentional purposes, and users may also uninstall it for different personal reasons. Anyway, if you have made up your mind to remove this program, read on this tutorial and learn the detailed instruction on CHKDSK removal.
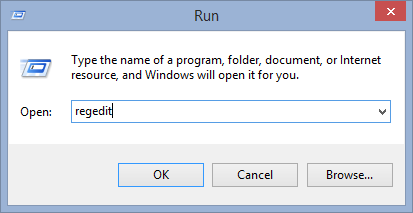
Manually Uninstall CHKDSK from Your PC
Here is the manual guide to help you handle CHKDSK removal. Please follow the steps below to avoid any possible mistake and to ensure a successful uninstall.
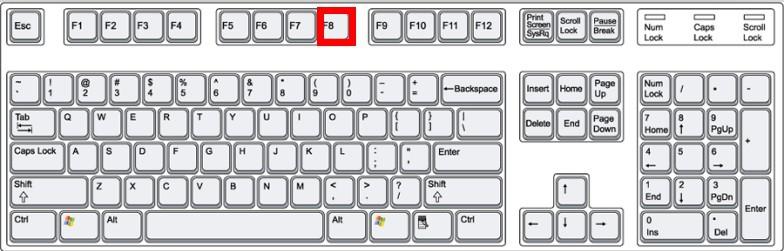
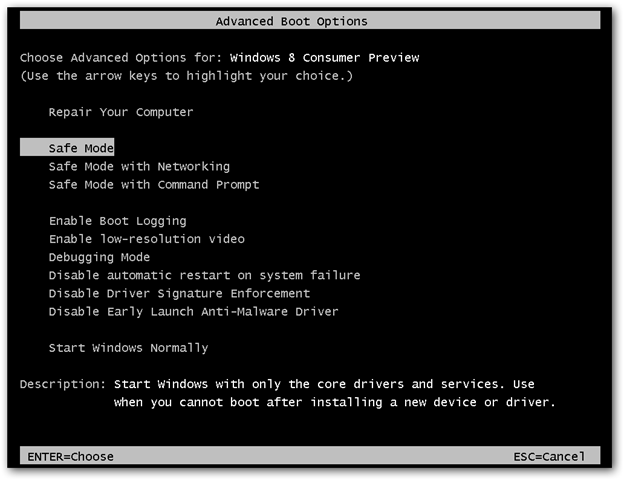
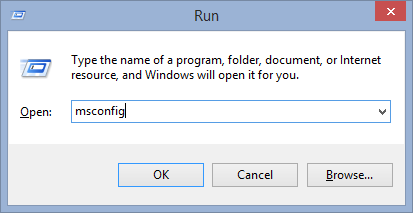
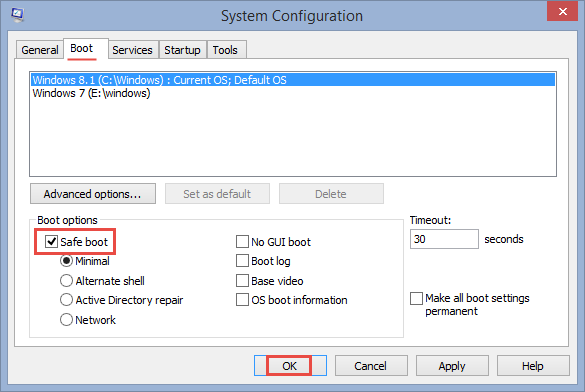
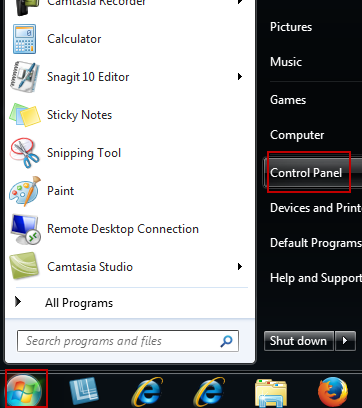
Step1: Start Windows in Safe Mode
Safe Mode is a Windows mode that uses only the most basic drivers and programs that are required to start Windows, thus to prevent third-party programs from automatically loading or opening. It can be used to diagnose hardware driver problems and computer infections. If you encounter any uninstall problems (such as you cannot terminate CHKDSK processes in Task Manager, or launch default uninstaller from Control Panel), try Safe Mode to troubleshoot your system and remove CHKDSK.
Step 2: Remove CHKDSK
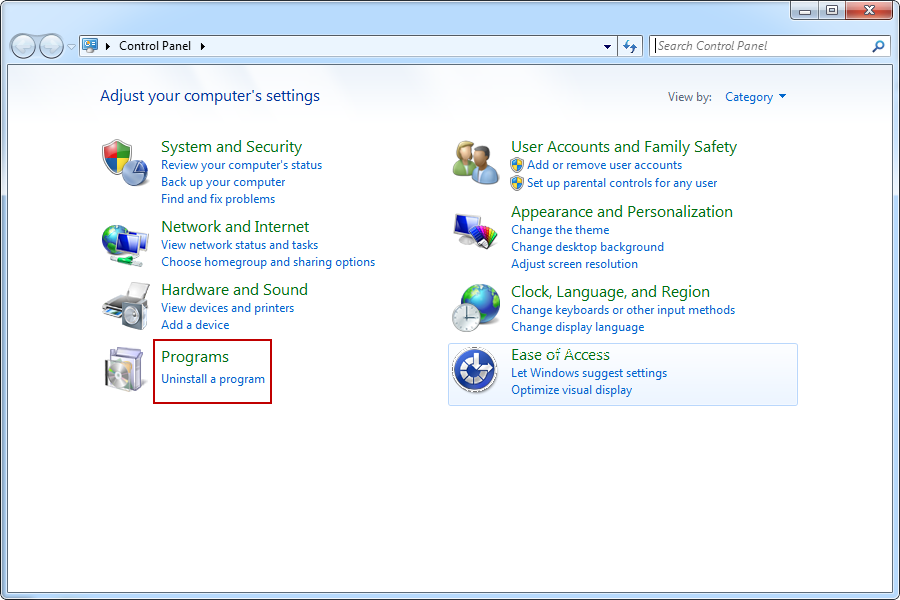
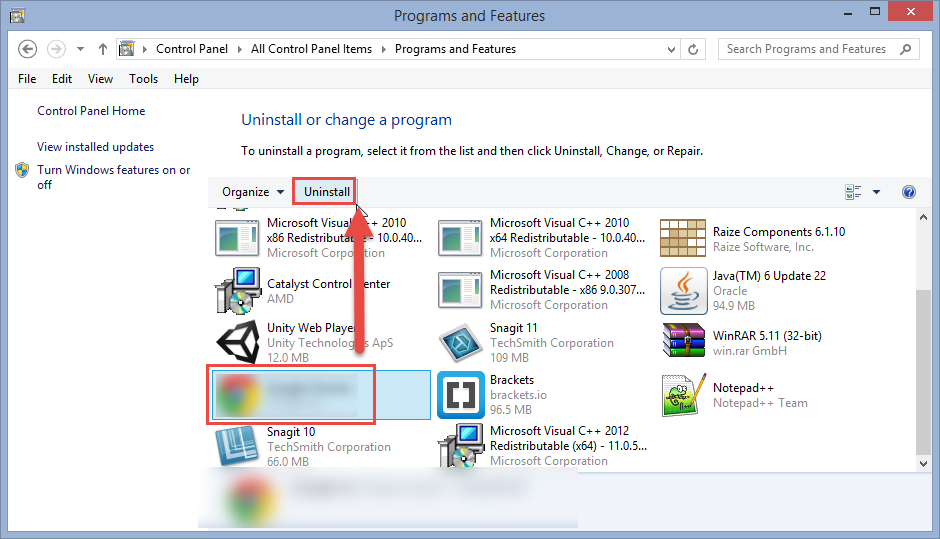
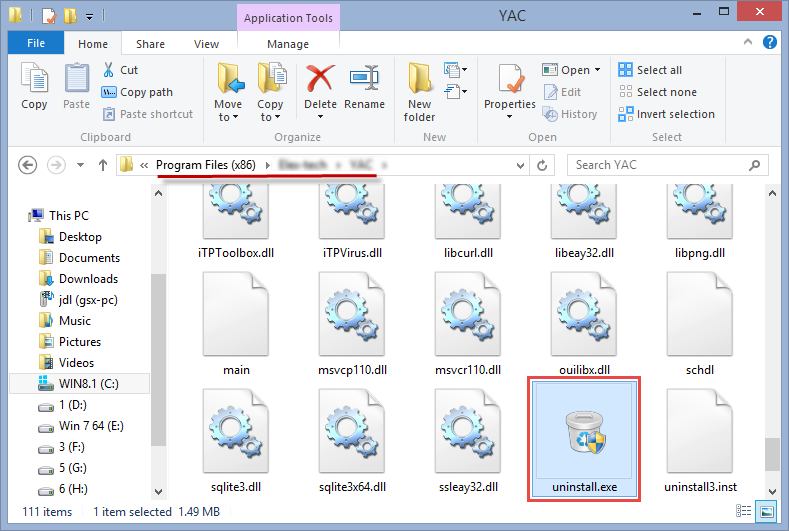
Besides, you can go to CHKDSK installation folder (usually saved in C:/Programs File/) and check if there is a file named uninstall.exe (or unins000.exe). If so, double click on this file to activate default uninstaller and get CHKDSK uninstalled.
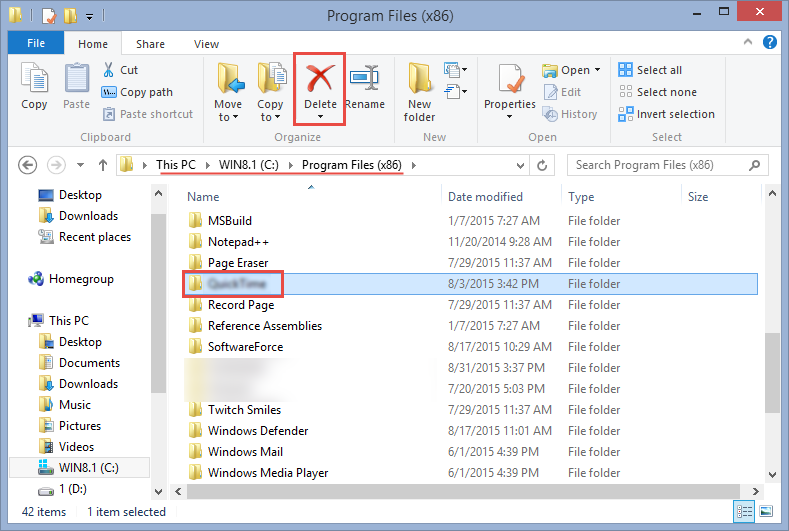
Step 3: Delete CHKDSK Leftovers
Performing the steps above dose not mean that you will achieve a 100% removal of CHKDSK. Usually, uninstalling CHKDSK from either Windows Add/Remove Programs or by its default uninstaller only remove the main executable files of CHKDSK, while its personal settings, cache folder, temporary files and specially the leftovers in the Windows Registry still linger on your computer. Consequently they will stuff your disk space and even degrade your PC performance. It is highly suggested to remove these residuals if you decide not to use CHKDSK anymore.
1. Registry entries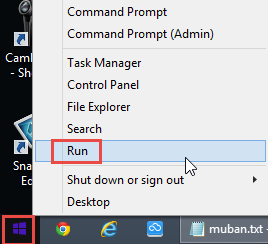
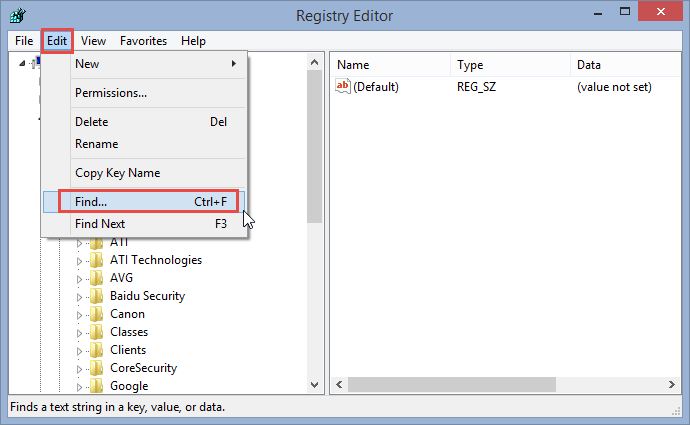
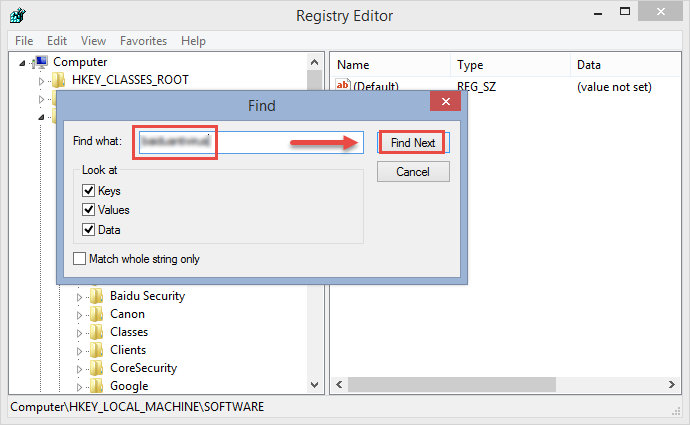
Notice: As Windows registry is a database that stores crucial configuration settings and options, you must be extremely careful when editing registry. Manually deleting registry keys or values here is not only time-consuming but also risk-taking. Unless you are proficient in computer operating, we do not suggest you to modify the registry on your own. And try to backup the entries you gonna delete if you are not 100% sure to do it right. For most common computer users, a professional uninstaller can really spare you from taking risk in deleting ambiguous program leftovers.
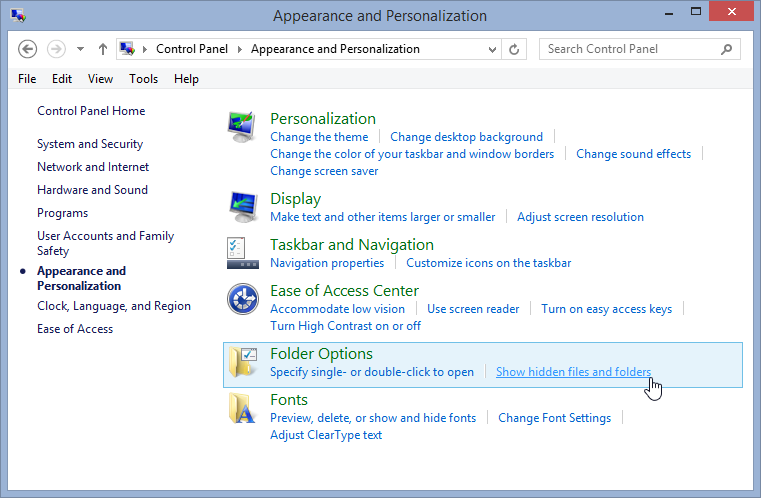
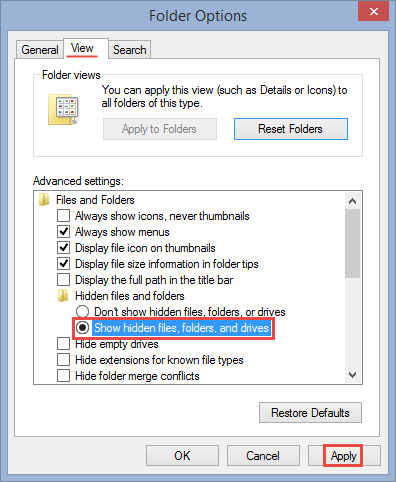
2.Files/Folders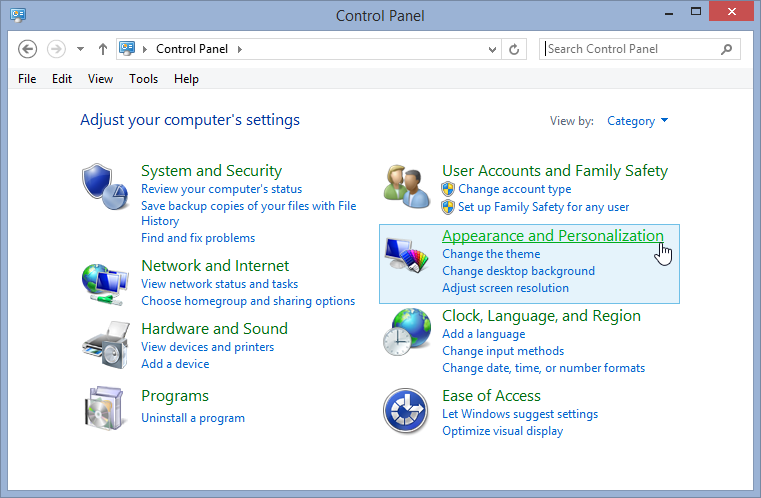
Any Shortcut to Remove CHKDSK Completely? Yes!
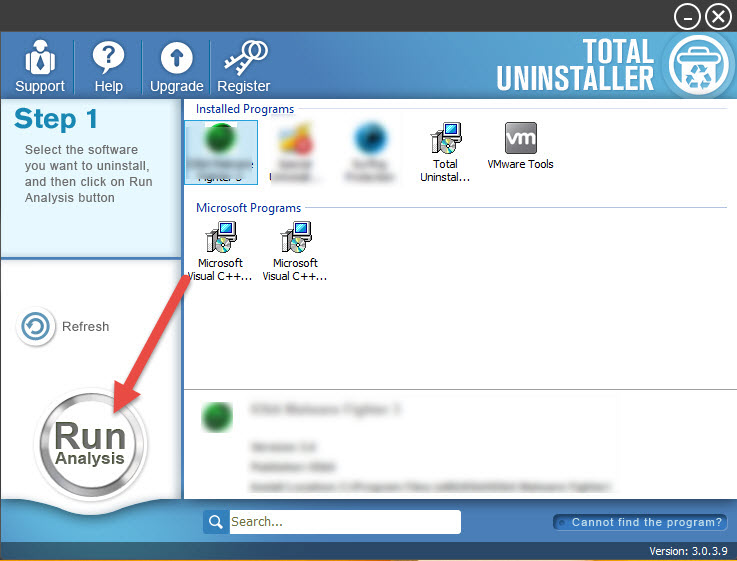
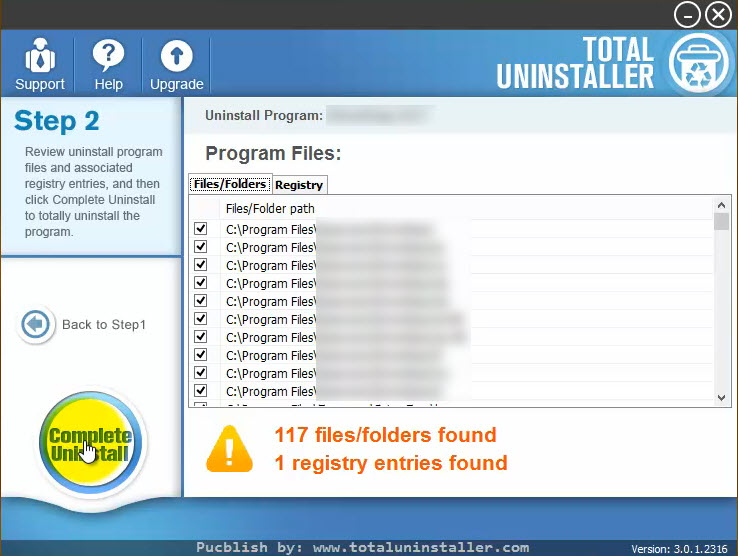
Have you ever felt it was complicated to fully get rid of CHKDSK through the manual procedure mentioned above? Just wanna save your time and energy in getting rid of CHKDSK? For most of the computer users, they might be inclined to adopt a much easier way to solve uninstall issue. So here it it! It is Total Uninstaller that we strongly recommend you to utilize to get CHKDSK uninstalled thoroughly. As one of the best uninstaller running on the Windows OS, Total Uninstaller is capable of locating every piece of target program and then wipe out all the traces lingering around your system. With this professional, reliable and user-friendly tool, all you need to do is click,click, and click!
Quickly uninstall CHKDSK in 3 steps

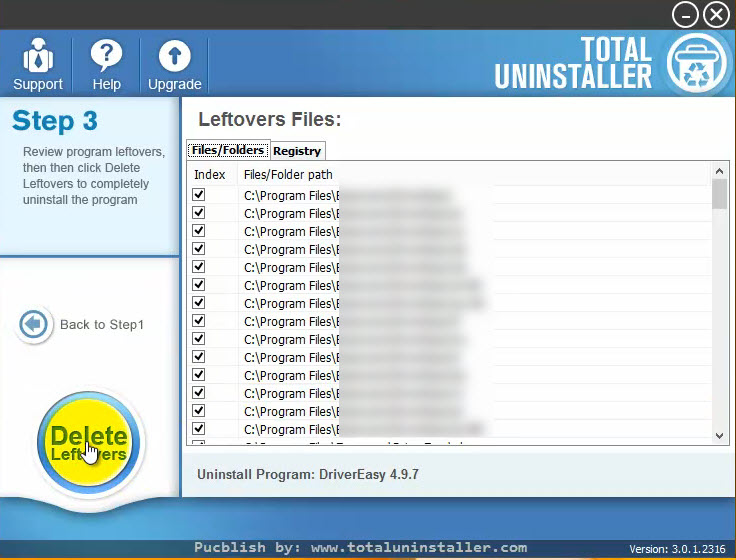
See? Only take a few clicks, and the whole removal process is done! Incredibly simple. Now you have successfully removed CHKDSK as well as its traces from your PC.
Benefits of using Total Uninstaller:
This article details two effective methods about how to uninstall CHKDSK thoroughly, and both of them work for most of the Windows programs. The manual way of getting rid of CHKDSK seems to be a little complicated to follow, especially for the uninitiated users. Utilizing a handy third-party uninstaller, by contrast, is definitely more suitable and convenient for most common people, and even the first-time users can handle Total Uninstaller to get troubles solved. Don't hesitate to download this powerful tool here, and enjoy the safe, clean and complete removal experience right now!
Leave your comment below
Industry Awards


How I can say. My CHKDSK is working again! Maci!