Archive for May, 2016

How to Install Language Packs & Change Display Language

No matter what language you are using on your Windows computer, you can easily install additional languages as you like to view menus, dialog boxes, and other user interface items.

images

There are two ways to change original language to your preferred one. The first way is to deploy Multilingual User Interface to transform almost the entire user interface to the language of your choice, but that’s available to users of the Ultimate or the Enterprise edition of Windows. The other one is to install a language interface packs, which is more freely available to users of Windows Home and Home Premium versions as well. Language packs will transform the most commonly used areas of the user interface, rather than the entire one to another language. Today we’re gonna show you how to install and change language packs on Windows. To install additional languages on your Windows, you can either use the Language Control Panel to easily change your system language, or you can download language pack from external links and install it separately. To install additional language packs using Windows Update, here are the steps to follow:

  • Click Start menu, choose Settings, and then click Time & Language.
  • Click Region & language in the left panel, and click Add a language on the right.
  • Select the language you want in the opened panel and it will start downloading.
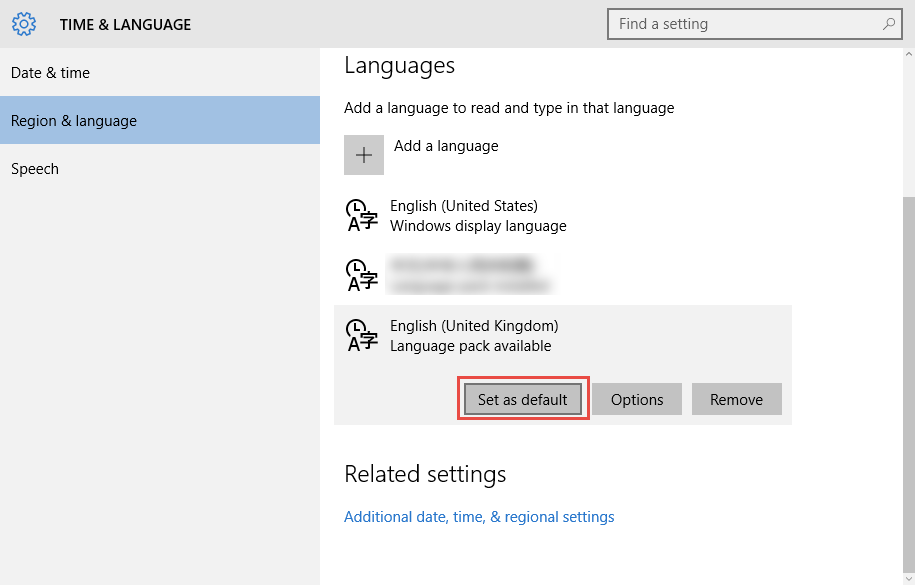
  • Click on the language that has been installed, and then click Set as default.
  • Log out and log in again to make the change take effect.
2016-05-27_15-16-54

Now, if Windows fails to download or install the language pack for unknown reason, you can download and install it manually. You should download the correct language pack matching your OS first, and then install it by performing the following steps:

  • Press Windows + R keys together to bring up the Run dialog.
  • Type “lpksetup” in the box and then press Enter.
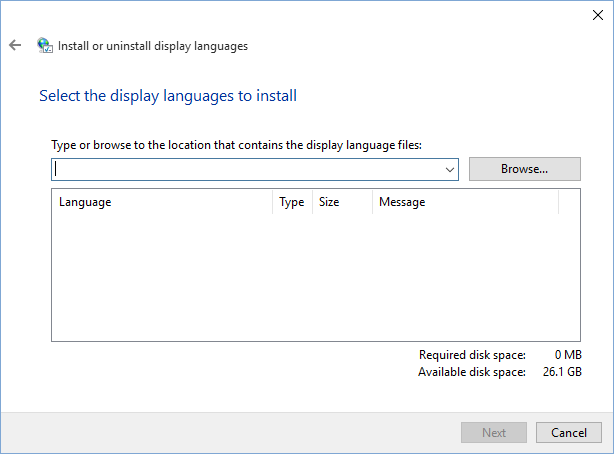
  • Click Install display languages in the Install or uninstall display languages wizard.
  • Click Browser… Button, navigate to the location where the language pack file is saved, and select the .cab file there. Then click Next button and wait while it is being installed. The
  • whole process may take a considerable amount of time to be completed.
2016-05-27_15-19-43

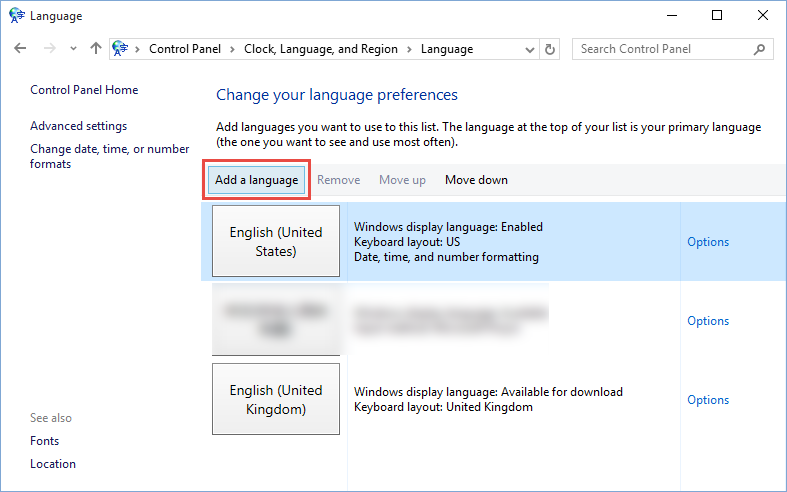
  • Head to Control Panel > Clock, Language, and Region > Language.
  • Click Add a language and select the language you installed to add it to the list.
  • Click Option next to the language and then click Make this the primary language.
  • Log out and log in again to make the change take effect.
2016-05-27_15-20-31

After that, you can use Windows in your preferred language. The text of dialog boxes, buttons, and windows will be displayed in the language you set as default.

But what if you want to remove or uninstall language packs from Windows 10?

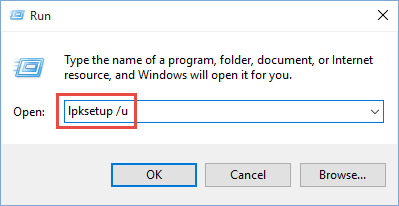
If you wish to remove language packs, you may open a command prompt window, type “lpksetup /u” and hit Enter. The Install or uninstall display languages window will open up. Then you can select the language you wanna uninstall, click Next and the Language Interface Pack will start uninstalling. As soon as the process is finished, you will be asked to restart your computer to complete the language pack uninstall.
2016-05-27_15-21-28

Is this article helpful for you? Welcome to share your thoughts here with us.

Google Crafts Art Camera to Capture Subtle Details of Artworks

port of rotterdam

Google launched Art Project in 2011 and cooperated with international museums to help the public access hign resolution images of great artworks. In the past five years, Google Cultural Institute scanned and perserved 200 works of art in high resolution gigapixel images. Now it has archived another 1000 using the ultra-high-resolution “Art Camera” during the past few months.

How did the sudden expansion happen?

Google Cultural Institute introuduced that they have developed the Art Camera system to perserve the subtle details of artworks down to every brushstroke. Art Camera is a robotic camera designed to create gigapixel images. The whole thing works like this. A operator sets up the camera in front of a wall where a paiting is hung, and points the camera at the four edges of painting. Once set up, the robotic system will automatically steer the camera to scan the paiting inch by inch and to take high-resolution close-ups. Art Camera is equipped with a sonar and a laser to make sure the focus is right on each brush stroke. As soon as all the details are captured, thousands of close-up shots will be sent to Google’s servers and then stitched into one single super high resolution gigapixel image at just a few hours later.

Thanks to the new custom-bulit camera, museums and institutions can capture and digitize art and documents much easier and faster. The capture time has been reduced largely. As Marzia Niccolai, the technical program manager at the Cultural Institute, said, it used to take almost a day to capture an image, but now it would take 30 minutes to capture a one meter by one meter painting. Meanwhile, previously institutes and organizations may need to pay money for bringing in third party image-scanning equipment. Now Google brought Art Camera and encouraged organizations to take advantage of it for free. The proces of perserving valuable artworks becomes much cheaper and streamlined. Google Cultural Institute express their willings to lend it out around the world to make museums’ artwork more accessible. With the help of Art Camera, museums can share their valuable but fragile collections with the global public, and art lovers can browser museum’ library of art online and fully appreciate a master piece by zooming in and viewing individual brush strokes.

Yet, Art Camera has itslimitataions. It can be used to capture and archive 2-D things, like flat paitings, but it is not capable to handle 3-D objects or things particularly large. For that, Google will still have to bring in other technology to achieve this task.

Google Cultrual Institute posted 1000 ultra-high resolution images artworks from masters like Pissarro, Signac, Rembrandt, Van Gogh, Monet and other well-know artists. They are now available at the Institute’s website. It hopes to help preserve priceless works digitally and to share cultural heritage to anyone around the world.

AdBlock and AdBlock Plus Available for Windows Edge

AdBlock for Edge

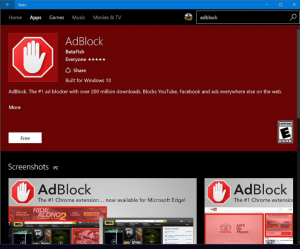
Not long ago Microsoft confirmed that it would add ad blocking support for its Edge browser, which is long-awaited by many Edge users. Now Microsoft Insider users can block web advertising with the extensions of both AdBlock and AdBlock Plus.

These two popular ad-blockers for Edge have been released officially in the Windows Store, and they are free of charge. As long as you are running the latest Windows 10 preview build, you can test out the extension-enable browser and install AdBlock or AdBlock Plus extensions to block internet ads in the Edege. The feature is sadi to arrive for everyone this summer with the Anniversary Update of Windows 10.

AdBlock and AdBlock Plus bring many of the same features as versions for other browsers, including controls over what type of ads to block, as well as whitelisting website where it’s ok to display ads. These two similarly named but actually unrelated add-ons received pretty good reviews on Windows Store right after the release.

u=1820554600,3187448651&fm=21&gp=0

As the sucessor of Internet Explorer, Edge gets a big improvements over IE, but it is still not an easy task for Microsoft to convince users to switch from Google Chrome or Firefox to Edge. Edge is released originally without extension support, which is somehow unacceptable for many Microsoft users, especially for those who rely on using extensions for their browsing experience. That may help explain why Edge held a mere 3.9 percent of browser market share as of February. A browser with a library of optional add-ons is critical for many users to navigate the web as they like.

Adding the feature of extension may be a smal victoriy for the Edge browser. Are those third-party extensions for Edge attractive enough to win back the losing users? That remains to be seen. But the support of more and more major extensions for Edge will undoubtedly bring a great convenience to its users. What do you think?

Like this article? Feel free to conmunicate with us, or leave your comment here.

How to Optimize Your SSD in Windows 10?

ssd

Windows 10 includes features to help users optimize different types of drives on their PCs, and it is necessary to defrag Hard Disk Drive at regular intervals to improve computer performance. Solid State Drive may not need defragmenting the same way as conventional hard disk do, but they do require occasional maintenance. Today we gonna talk about why and how to optimize your SSD using Windows built-in tool –  Optimize Drives. Continue reading.

________________________________________________________________________________

Is it good or bad to trim SSD? why to optimize my SSD? SSD works differently from traditional mechanical hard drives and it supports limited writes. There is no need to defragment SSD too often. But it is possible that drives hit maximum file fragmentation which will result in errors when trying to write or extend the file, and when a drive is highly fragmented, that will slow down the read and write process on drive. That helps explain why you need to optimize SSD at times.

Trim is an operating system function that helps an SSD manage space containing data that has been deleted or invalidated by the operating system. Windows 7 is the first version that recognizes SSD drives, and a Trim command has been available since Windows 7. But at that time this feature was somehow invisible to the end-users. Windows 8 came along with its own set of optimization specifically for Solid State Drives. Now Windows 10 brings in more improvements for SSD optimization. There are a few handy ways to open Optimize Drives in Windows 10:

Way 1:

  • Click This PC shortcut on the desktop (or open it in File Explorer).
  • Right click the drive you wanna optimize, and then choose Properties option.
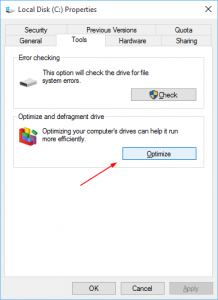
  • Click Optimize button in the Tools tab to open Optimize Drives app.

Drive-Tool-Properties-Optimize

Way 2:

  • Click This PC shortcut on the desktop (or open it in File Explorer).
  • Select the target drive, and click the Manage tab in Drive Tools menu.
  • Click Optimize button in the ribbon to bring up Optimize Drive window.

Optimize-Drives-2015-08-05-16_49_30

Way 3:

  • Type defrag (or optimize) in the search box.
  • Click Deframent and Optimize Drive from the result list.

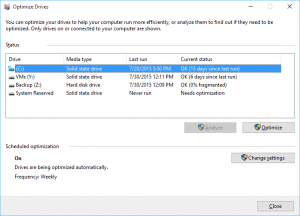
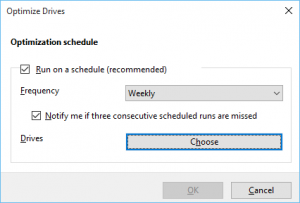
As the Optimize Drive windows opens, you can highlight the drive in the list of volumes and click Optimize button to perform the Trim command. Then you will see a brief status message and the trime operation should be compeleted in a few seconds. Optimize will allow a user to execute trim on a predetermined schedule and run it on a point-and-click basis. Once you delete a large file, you can immedaitely reclaim that deleted space by using this Optimize feature. It is useful on drives that are almost full. Besides, you can click Change settings button in Optimize Drives window to turn scheduled optimization on/off, or change the frequency of automatic optimization.

Optimize-Drives-schedule

If a drive does not appear in Optimize Drives, try to repair the drive with chkdsk first.